Create Facebook Apps and Publish them using Heroku
What will this guide do?
This guide will take you step by step through the process of publishing an app on Facebook. This process is a relatively simple one; however, complications arise when hosting the app as the process must be done on a domain with an SSL certificate (https) which cost around £300 per year. Fear not, though, Facebook has teamed up with Heroku, a cloud storage provider with a penchant for all things Japanese, to provide you with free hosting for your app.
Despite Heroku’s pretty front end, the process of actually deploying an app with them is horrifically over complicated, so to make life easy, this idiots guide to Heroku and Facebook Apps is going to break it all down and provide step by step instructions for both Windows and OSX.
What won’t this guide do?
This guide won’t teach you how to actually make Facebook apps. There are plenty of resources providing this information, but if you know how to design a website, then you’re in a good position.

Step 1: Put of your developers’ hat.
Go to https://developers.facebook.com/apps where you can log in with your normal Facebook details.

Step 2: The Wonder of Creation!
Click the ‘Create New App’ button in the top right-hand corner of the screen and then develop a name for your new app. You also have the option to add a ‘Name Space’, which will be your Facebook apps unique ID.

Step 3: Hosting Your Facebook App (you better have SSL!)
I’m now going to talk you through the headfuck that is Heroku. If you have access to an SSL server already, things will be much easier for you; skip to step 8.
Step 4: Chose your Environment
After you’ve chosen your apps name, you’ll be taken to more settings. Checking the box that says ‘Free hosting with Heroku’ will bring up this box.
Enter your email address to create a Heroku account and chose an environment. If you’re just uploading a website, then you’ll probably be fine with PHP, don’t forget to change the .html extension of your index.html to index.php before you upload to Heroku.

Step 5: Enter the Dragon
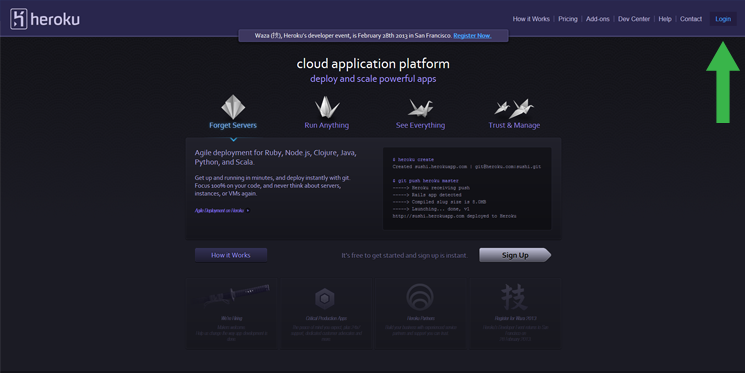
Go to https://www.heroku.com. You’ll notice the site’s design looks great, and everything is laid out; sadly, this doesn’t mean you’re going to a get simple drag and drop system to deploy your app.
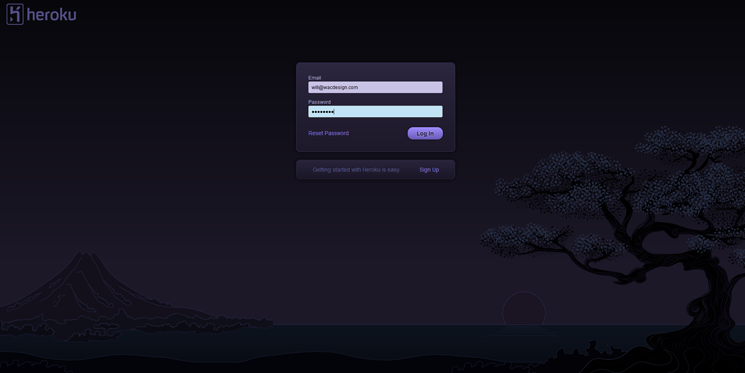
Log in using the top right button with the email and password you used to create the app on Facebook.
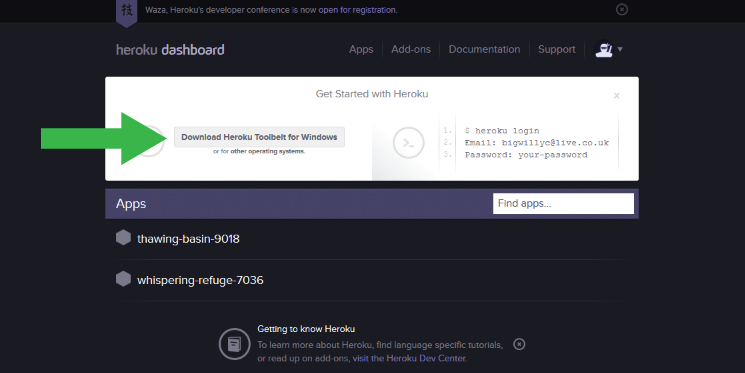
You’ll be prompted to download the tool belt for your specific operating system. If the message doesn’t appear, you can find the tool belts here https://toolbelt.heroku.com/
Step 6: The Tricky Bit
Install the Tool belt, and once done, open up the command prompt (Windows) or the Terminal (OSX) and type: heroku login and enter your sign in details.
heroku login
Enter your Heroku credentials.
Email: [email protected]
Password:
yourpassword
New users will be prompted to create a new public key, press ‘Y’ to confirm.
Could not find an existing public key.
Would you like to generate one? [Yn]
Generating new SSH public key.
Uploading ssh public key /ssers/will/.ssh/id_rsa.pub 
Go back to the Heroku website. Your app will have been randomly assigned a ridiculous sounding name like whispering-tiger-1742 or sleepy-willow-1066.
 Click on your app and then click the settings button. Here you’ll find your Git URL, which will look something like this:
[email protected]:safe-harbor-6922.git
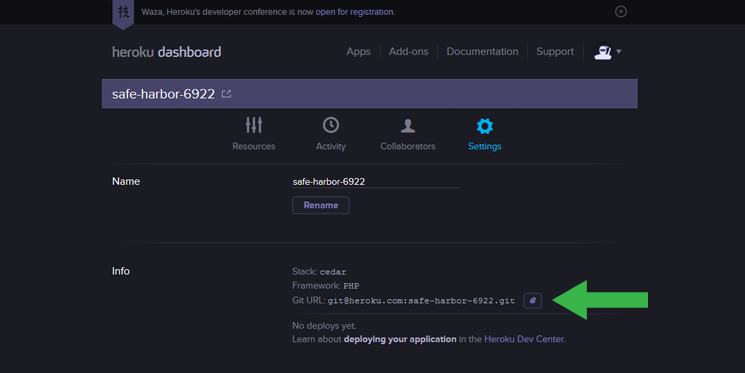
Copy it to your clipboard and then return to your command prompt or terminal and type:
git clone
and then paste your git URL so it will look like this:
git clone [email protected]:safe-harbor-6922.git
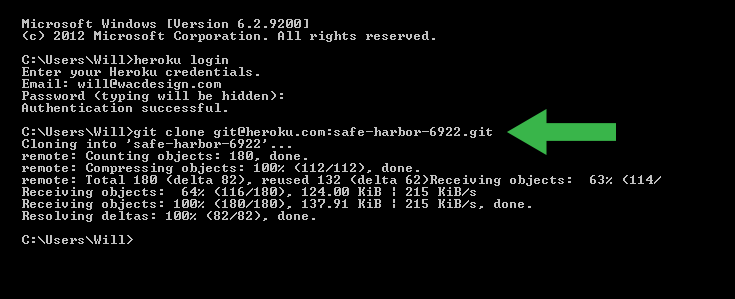
After you press return, you’ll see the files being copied from Heroku’s servers to your local drive. For windows, the files will be located here:
\users\your-name\name-of-your-app
In my case, the file was here
users\Will\safe-harbor-6922
On OSX, the files will be found in the equivalent place.
So there are your files. You can edit then and replace them to your heart’s content.
Step 7: Puttin em’ back
When you ready to get your app back up to the Heroku server, go back to the command prompt or terminal and type:
cd your-app-name

to change the directory to that of your application, so in my case, it’s:
cd safe-harbor-6922
The directory will change to your app, at which point you need type:
Git add.

You can target specific files but adding the ‘.’ copies adds all files to the list.
You then need to commit your list, so type:
git commit –m description
Where I’ve written description you can put anything to describe the change you’re making, such as revision.
The console will tell you about all the files you’re going to upload.
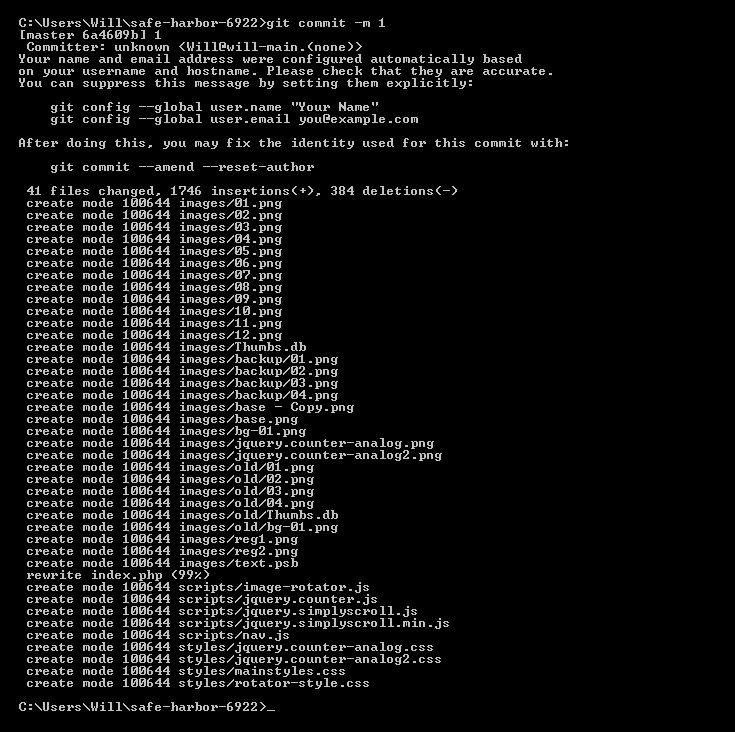
Then simply type:
git push
Your files will now be uploaded to the server (it may take a couple of minutes, depending on how much content you have).
When it’s done, you can view your app:
https://your-app-name.herokuapp.com/
Step 8: Finishing Touches
Go back to the app on the Facebook developer page and make any changes you want to the settings, such as uploading a 111×74 tab image before clicking save changes.
If you’ve just joined us from step three, all you need to do now is take the URL of your app and paste it into the ‘Page Tab Url’ and ‘Secure Page Tab Url’ boxes (or whatever type of app your creating’). Heroku users, your app URL will already be in the boxes.

In the text box below, change the ‘YOUR_APP_ID’ & YOUR_URL with the correct data and then paste it into your browser.
The App ID and the URL is here can be found here:

So mine would be:
https://www.facebook.com/dialog/pagetab?app_id= 510142309024889&next= https://safe-harbor-6922.herokuapp.com/
Choose the Facebook page you want to add the app to, and hey presto, your app is up and running!

A couple of tips, make sure your links are target _blank or they’ll open within the Facebook frame.
Also, you may benefit from adding:
body {overflow:hidden;}
to your CSS to avoid the scroll bars on your app.
I hope this has been of help to you. If you discover that Heroku or Facebook have changed any part of the process, do, please let me know, and I’ll update the guide.


